I decided to make my son a piñata for his Pokemon Party after reading some excellent suggestions other parent bloggers had on their pages.
The party pretty much planned itself. Thanks to the beauty that is the internet, I just had to see what others had done and choose the things we liked from a multitude of sites, then make our party based on my own crafty abilities and budget.
This is where the problem always arises. People love putting up beautifully posed pictures of their parties. Those same people seem to always forget to show you HOW they did it. Super not helpful.
As I was making our Jigglypuff piñata, I realized I did not want to be that person.
Here is how I did it.
First gather your basic pinata making supplies:
a balloon – I like to get the bopper ballons, they are stronger, more circular, and come with a handy built in rubber band that is perfect for hanging your balloon up in between drying the layers of the piñata

newspaper strips – we let the boys rip them – they loved it

flour and water – I used a simple 1 cup flour to 2 cups water recipe
crepe paper
cardboard, really thin from a frozen pizza box or cereal box
some sort of bowl for your paste and a drop cloth
glue stick
masking tape
glue – I like Elmers
compass – to create eyes for Jigglypuff
markers
construction paper, 1 white, 1 red, 1 black
stapler
scissors
knife
ribbon ( at least four ft)
Here we go.
First make your standard piñata. Blow up balloon and tie off. Start dipping your paper strips in the paste and applying to the balloon. Do up to two layers at a time and then let dry. Each of our layers took about 24 hours to dry. I did a total of eight layers. So give yourself at least five days for this project, don’t wait until the day before a party to do this.
Once dry ( all layers) start gluing the crepe paper on.
I folded the paper in half longways, working with three foot sections, and then on the inside fold cut a snip about halfway through every couple of cms.

Then slowly glue the crepe paper working your way completely around the balloon. I just glued the top half of each letting the ruffle pocket at the bottom hang loose. it should like this when you are finished.

I used almost an entire roll of crepe paper doing this.
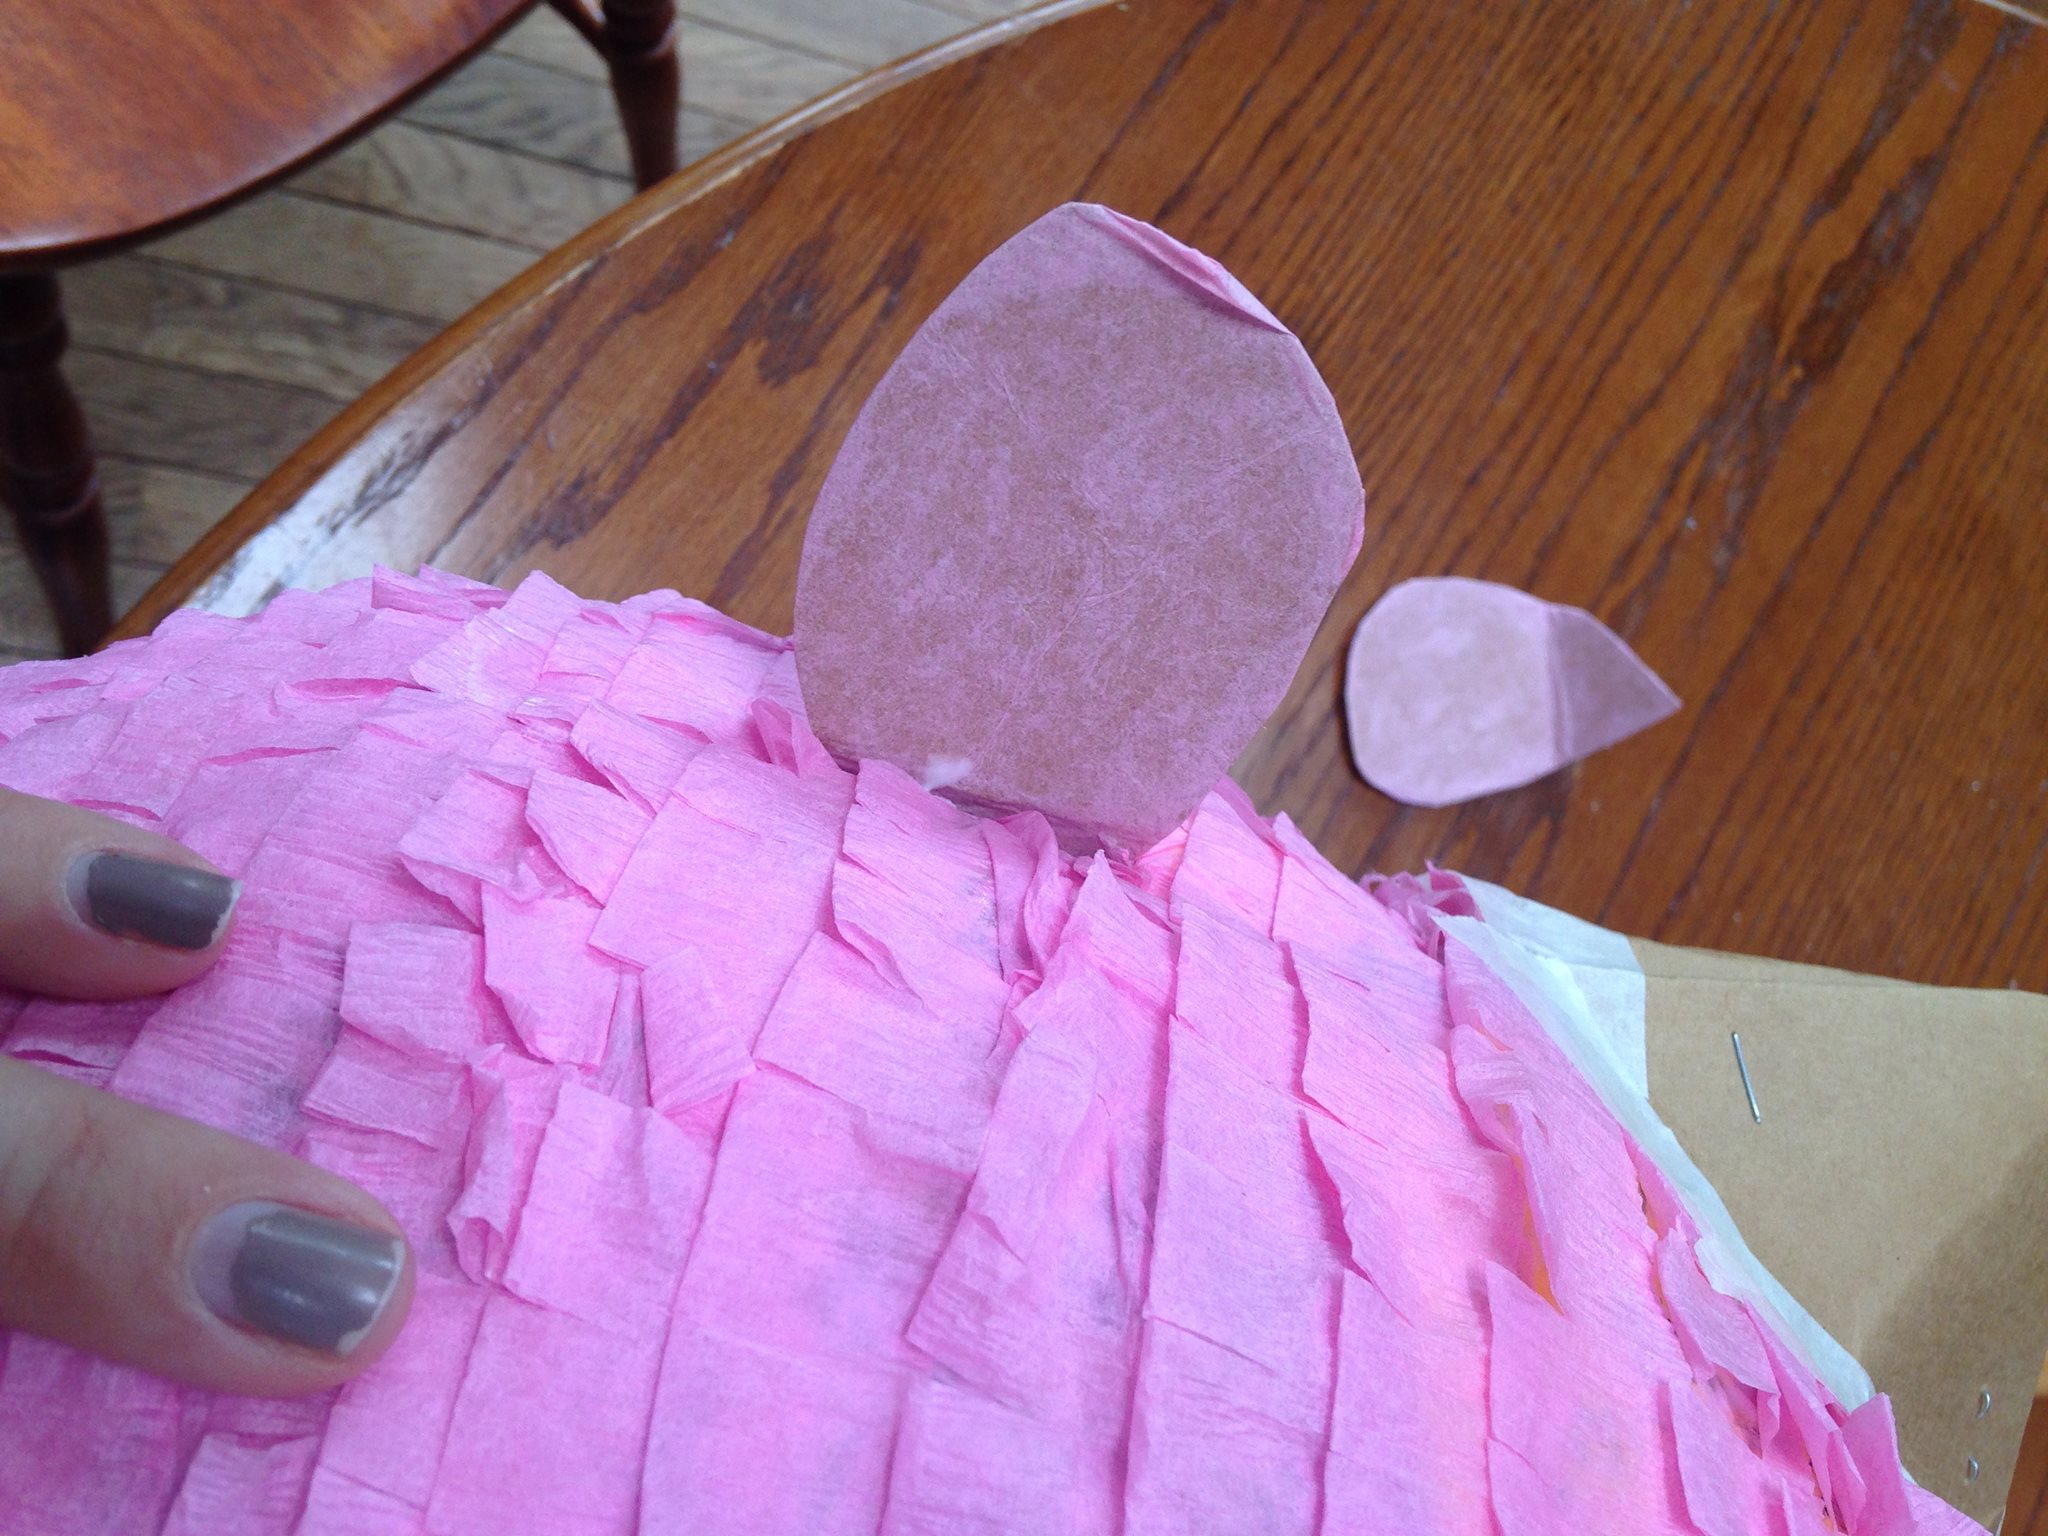
Now I add the ears, legs, arms, eyes, mouth, and the puff on the forehead.
For the ears, legs, and arms I cut from a frozen pizza box pieces for each of these items.

I will recreate the ears process with a paper plate, so as not to be a jerk.
Cut a circle, about 4 inches in diameter out of the center of the plate.

fold in half one way, unfold, then the other.


Now fold in two of the opposite sections to make an ear shape. It should look like this.

Then staple.


Voila, you have an ear.

Now cut small slits all the way around the ear so it can be easily taped to the top of the head.

Like so.


Now cut out simple arms and legs. I did tear drop shaped.Use your glue stick to cover the arms and feet with thin pieces of crepe paper.I then used a knife to cut thin slits in the pinata and just slid the arms and legs into place. It seems secure enough for me.


Next I made the eyes, mouth and ear triangles out of construction paper. I do not have a template for this part. For the eyes I used white paper and used my compass to make a series of circles doing my best looking at a picture of Jigglypuff. Then I colored in the circles with different shades of blueish green. Luckily we had two sets of markers,because I did not check to see that my boys let some of the markers I was planning in using dry out. You might want to check that first. For the mouth and the ear triangles, I just did my best.


After gluing these into place, all that is the puff.
I used the last bit of crepe paper that I had cut, folded, and ruffled to make a small spiral mound on the forehead.
Now you need to fill your pinata. Widen the hole or make a flap on top of the head.
I found an Amazon a bulk lot of 144 Pokemon figures that are all about a half inch in size ( total choke hazard, I know) I put these into baggies ( one for each child who I know is coming) and then I also put in Annie’s Bunny Fruit Snacks ( It’s still totally junk, but slightly less junkier junk).
Here’s the Amazon link: http://www.amazon.com/144PCS-POKEMON-ACTION-FIGURES-CNFT/dp/B00DUFMC9O/ref=sr_1_2?s=toys-and-games&ie=UTF8&qid=1443466133&sr=1-2&keywords=pokemon+figures
Put in whatever floats your boat!


Last thing!
You need to create some sort of anchor to hang your pinata.
I made four small holes around the crown of the head with the sharp end of scissors.
Then thread blue ribbon into each of the opposite holes, then thread it through to the other two holes, and tie it.

I have decided to keep the trap door I made on top of the head to load the candy in open, just in case I need to refasten something.
Here it is folks, Jigglypuff!

I hope this helps at least one other parent trying to throw their child an epic Pokemon party.
Have an awesome party and remember the most important thing.
It doesn’t have to be perfect!
( Especially this, because it will be destroyed in the very near future!)

Thank you so much for these wonderful directions! You have made my soon to be 6 year old’s birthday party compete. I thought I was going to pass out when she asked for a jigglypuff piñata for her party but this was easy and my first piñata. Thank you!
LikeLike
I’m so glad to hear that. Happy Birthday to her!
LikeLike